CONTROL YOUR DIGITAL SIGNAGE SCREENS WITH VSIGN
With VSign’s rich media support, flexible design features, infinite scheduling and priority capabilities; you can control your screens anytime, anywhere.
Available digital signage screen platforms:
- Windows,
- Android
- Player integrated (SoC)
Login to VSign CMS
Figure-1: Vsign login screen
- Administrator account is provided after installation.
- Additional user accounts can be created with various permissions.
- Each user is assigned a CMS dashboard which they will be taken to after login.
Different Dashboard Types for VSign CMS
Figure-2: Vsign dashboard screen
Available dashboard alternatives for VSign CMS
- Status Control Dashboard
- Icon Dashboard
- Media Dashboard
Status Control Dashboard
Figure-3: Status Control Dashboard screen
- Designed specifically for administrator user type.
- Info about media library, bandwidth usage, connected screens and up-to-date news are available here.
Icon Dashboard
Figure-4: Icon Dashboard screen
- Designed specifically for standard user type as a Fast Start
- Icons in this panel can be visible or invisible with respect to the user access rights.
Content Dashboard
Figure-5: Content dashboard screen
Grid layout based dashboard; designed specifically for content editor user type with limited acess rights on other features.
Displays
Figure-6: Displays screen
- Displays are uniquely identified by a “hardware key“, generated when the signage player software is installed. This hardware key is used to create a Display record in the VSign CMS and is unique to that one Display record.
- VSign CMS provides a page for Display Administration which is used to show the user the Displays they have permission to view and the status of those Displays.
- The display administration table gives an easy to understand overview of each display registered in the VSign CMS.
Figure-7: Editing display
- Connecting a Display: Displays connect to the VSign CMS over an API.
Each signage player software application will have its own method of registering and connecting to the CMS – most of them only require the URL and CMS Key. - Display Edit: Before the display will be allowed to download its schedule or required media it must be licensed with the VSign CMS.
After a display client is registered a new display record will appear in the Display Administration – it needs to be edited to grant is access (getting a license).
Layouts
Figure-8: Editing layout
- A layout is a complete screen design, including content and a background image, which can be scheduled across multiple displays at multiple times.
- A layout has one or more regions which contain a playlist of media to show. You can design layouts that you want to play on player screens (clients).
- Layouts are viewed from the Design section of the menu by clicking the Layouts menu item. The default view shows all Layouts the user has permission to view.
Layout Designer
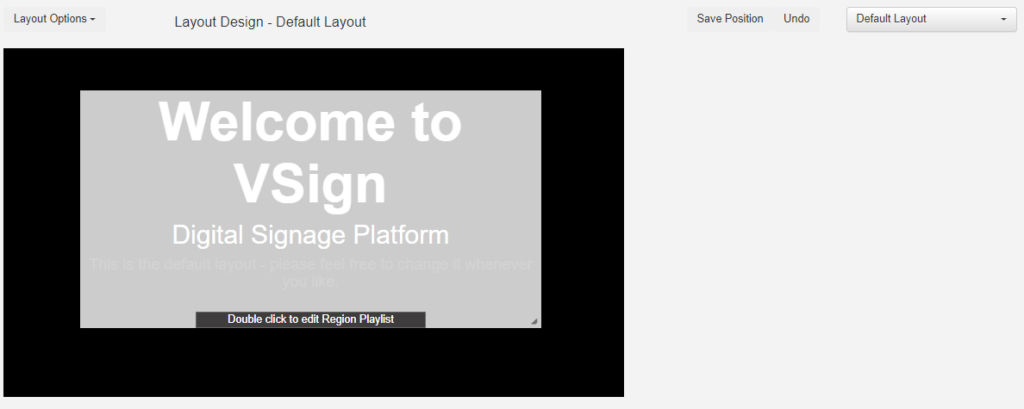
Figure-9: Layout designing
- Each time a new Layout is created, or an existing one needs a design change, the Layout Designer is used.
- VSign makes Layout Design simple through the use of drag and drop, interactive previewing and design flexibility.
- When Designing a Layout from scratch all of the default templates come with one Empty Region, pictured above.
Adding Regions
Figure-10: Editing regions in layouts
- Regions are added using the Layout Designer Options Menu. Once the Add Region menu item is clicked a new region appears and is ready to be moved or resized by the designer.
- Each Region has its own menu of Actions – similar to the Action menu found on the Layout Table. The Action menu for Regions always appears at the top right of the Region and also shows the Width, Height and Coordinates.
Playlists
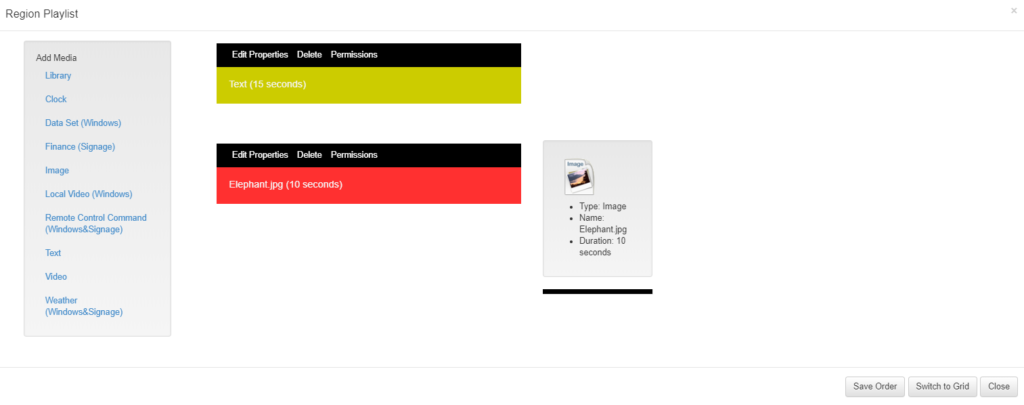
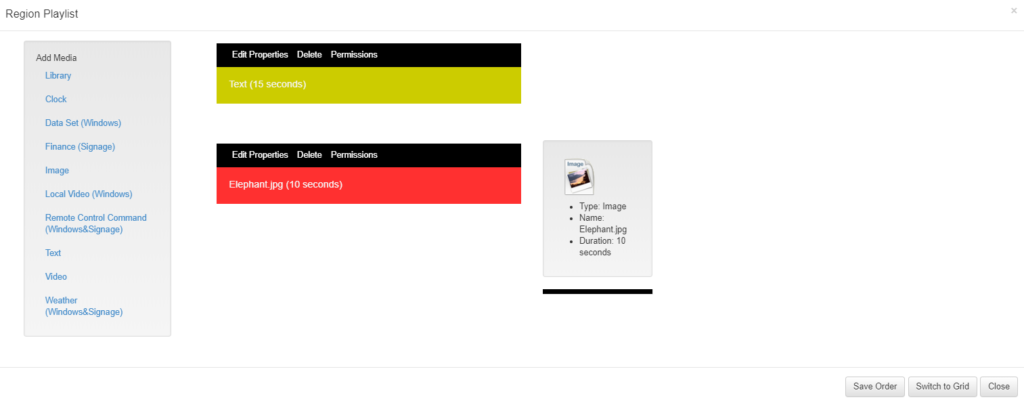
Figure-11: Editing playlist
- Each Region on a Layout has its own Playlist of content, which will be shown in order by the Display Client. If required a Playlist can consist of a single item (such as a company logo), or multiple items (such as an image slide show).
- A Regions Playlist is viewed/edited by using the Region Menu and selecting Edit Timeline. The form is shown above.
- The items assigned to the Playlist are called Widgets and can either be files stored in the Library or Modules. The sequence of media in the Playlist is vertical – top down. The sequence of a media item in the Playlist can be changed with drag and drop.
Scheduling
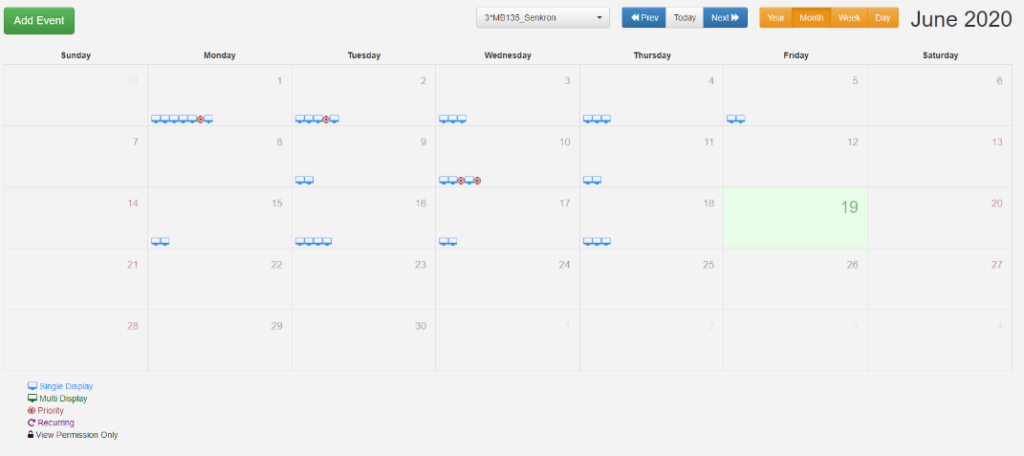
Figure-12: Scheduling
- VSign has a sophisticated scheduling system allowing for scheduling Layouts and Campaigns across Displays and Display Groups. This is achieved through Schedule Events and visualized on the Calendar.
- Events have the following properties:
- Events spanning two dates – no maximum or minimum time
- Recurring events
- Priority events
- Schedule an event for more than one Display / Display Group at once.
Schedule
Figure-13: Editing a schedule event
- When a Display has more than one Layout scheduled to it at one time it will automatically alternate between the Layouts in the schedule.
- If at any time there are no Layouts scheduled to run, the default layout for the Display will be run automatically.
- When Schedule Menu is selected, the following page is seen. This page shows a calendar with a control bar on top of page. Monthly View is selected by default.
Usage Scenarios
Figure-14: Usage scenarios
1. After logging in to VSign CMS, the Displays tab is shown.
2. The client screen has been installed; name and other features should be seen in this table.
3. Click the rightmost button on the line of the relevant screen and select Edit
Figure-15: Editing a display
4. From the Edit Screen screen, click Screen License tab should be selected Yes. Continue by clicking Save.
Figure-16: Editing a layout
5. Go to the Layouts tab under Design and click Add Layout from the top right.
6. After entering information such as Name and Resolution, click Save.
Figure-17: Layout design
7. The Layout Design screen has a predefined full-screen gray Region. When you reach the top right corner of the Region, the region resolution and coordinates are displayed with a button. Click this button and select Edit Timeline.
Figure-18: Adding new image
8. Select Picture option in Region Timeline screen, and drag an image file onto the Add New Image pop up screen. Click Assign to Layout and Close respectively.
Figure-19: Region timeline screen
9. After Assign to Layout is clicked, Save Order is selected in Region Timeline screen. Click Close at the end.
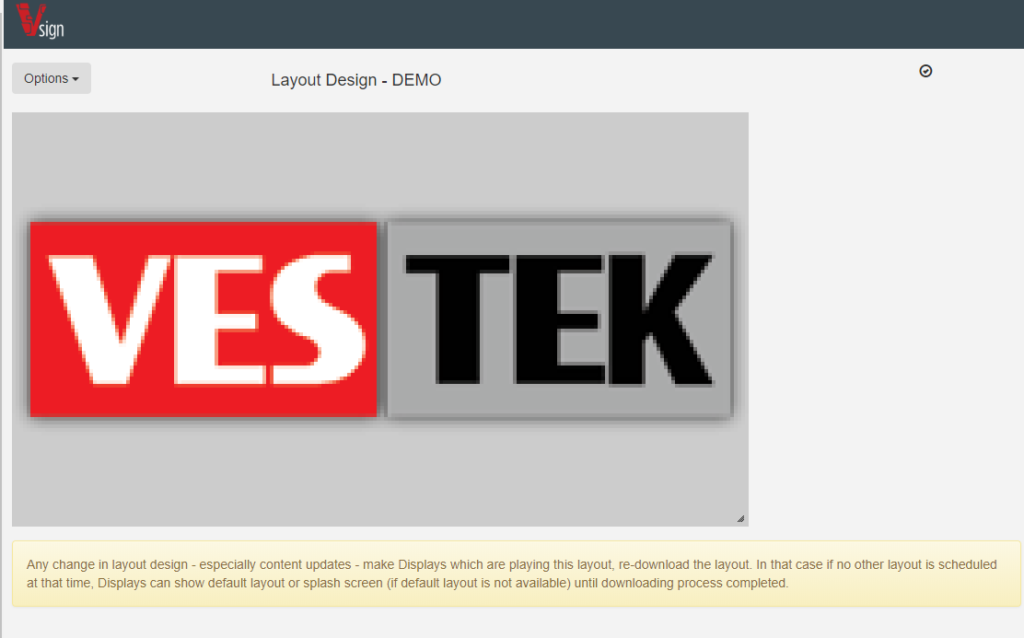
Figure-20: Logo design
10. The image of the Layout Design screen becomes the above with the added logo.
Figure-21: Adding logo
11. Go to Displays section from the left side navigation bar. On the row of the client display, select Edit from the right hand side button.

Figure-22: Editing display
12. From the Edit a Display screen, edit the Default Layout with the layout and press Save. The client display will download the layout and start to show it accordingly.
Create a Multiple Region Layout

Figure-23: Creating multiple layout
1. Go to Displays section from the left side navigation bar. On the row of the client display, select Edit from the right hand side button.

Figure-24: Editing display
2. From the Edit a Display screen, set License Display? As Yes and press Save.

Figure-25: Adding layout
3. Go to the Layouts tab under Design and click Add Layout from the top right.
4. After entering information such as Name and Resolution, click Save.

Figure-26: Layout design
5. The Layout Design screen has a predefined full-screen gray Region. When you reach the top right corner of the Region, the region resolution and coordinates are displayed with a button. Click this button and select Edit Timeline.

Figure-27: Adding new image
6. Select Picture option in Region Timeline screen, and drag an image file onto the Add New Image pop up screen. Click Assign to Layout and Close respectively.
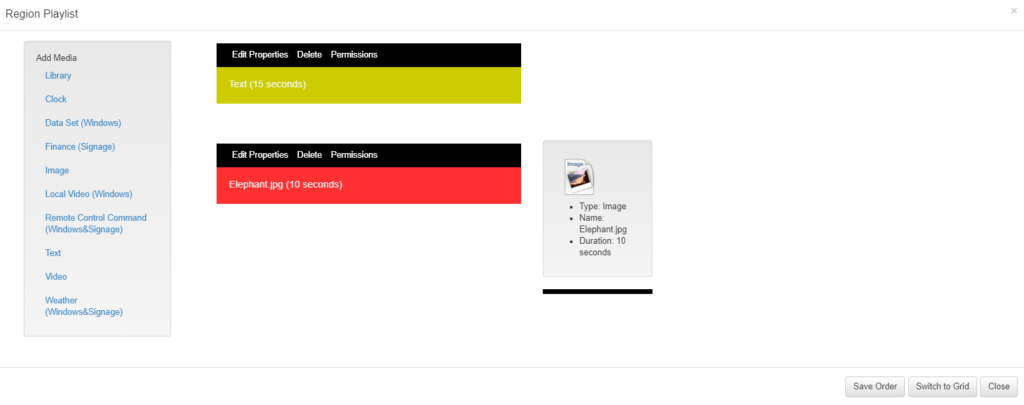
Figure-28: Editing playlist
7. After Assign to Layout is clicked, Save Order is selected in Region Timeline screen. Click Close at the end.
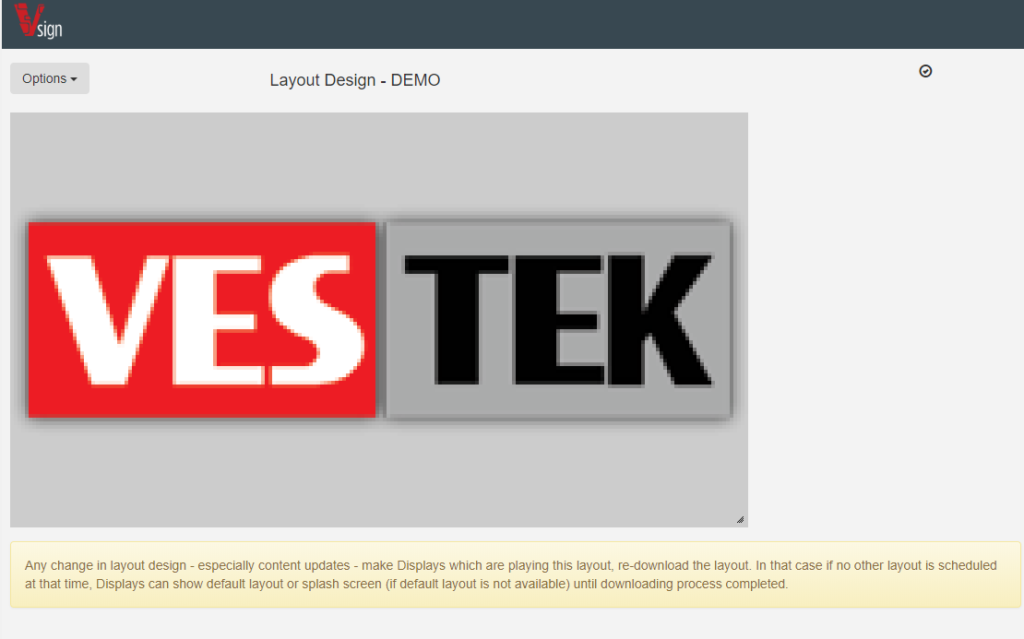
Figure-29: Layout design – logo
8. The image of the Layout Design screen becomes the above with the added logo.
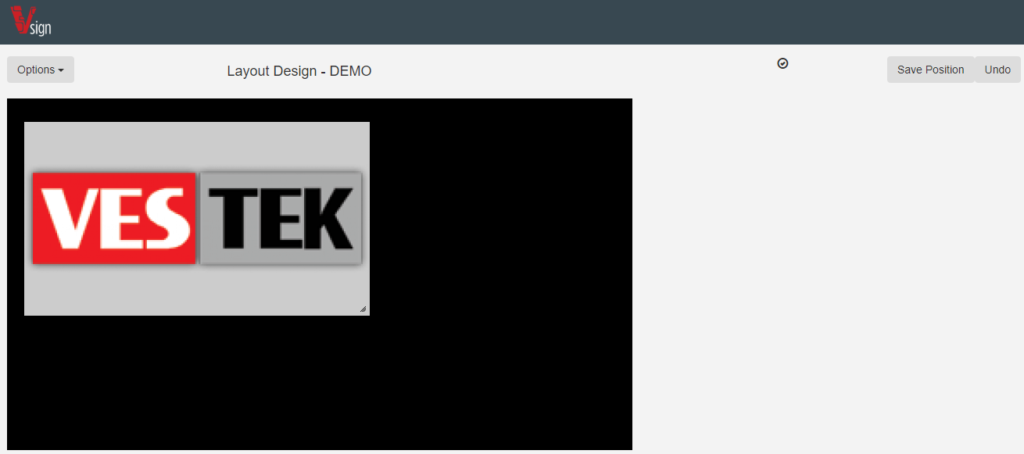
Figure-30: Layout design – logo
9. We can expand and narrow the full screen Region with the help of the mouse at the bottom right. We will need to use the Save Position button at the top right.

Figure-31: Layout options
10. Click the Options button in the top left and select the Add Region option.
11. Once the newly added Region has been edited, click the Save Position button in the upper right
12. Click the button in the upper-right corner of the newly added Region and select Edit Timeline.
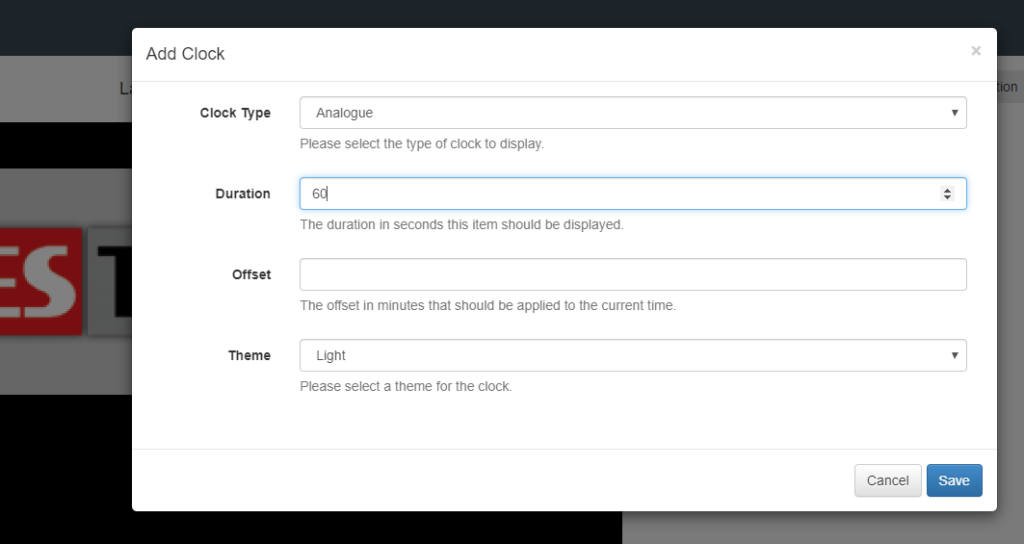
Figure-32: Adding clock
13. On the Region Timeline screen, select the Clock option. Select the appropriate time and tabs on the Add Clock screen and press Save.

Figure-33: Layout design – logo and clock
14. Our design has been updated as two regions in Layout Design screen. Switch to the Displays tab on the left.

Figure-34: Layout Design
15. Click the rightmost button on the client display line and select Edit.

Figure-35: Editing display
16. From the Edit a Display screen, set the Default Layout option and press Save. The client display will download the Layout and start displaying.
Scheduling a Layout
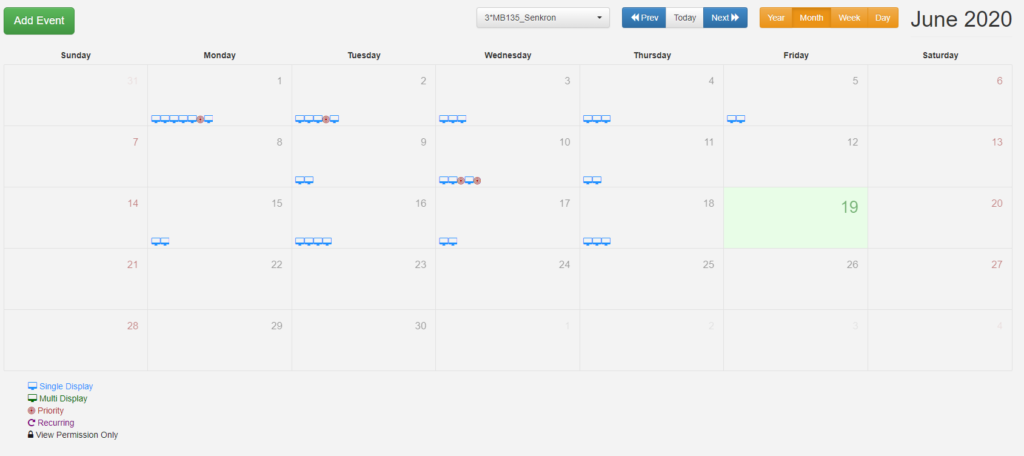
Figure-36: Scheduling a Layout
1. After logging into VSign CMS, select the Schedule tab from the left-hand instrument panel menu. The Calendar screen will be displayed with the Monthly view selected as default.

Figure-37: Scheduling an Event
2. Click the Create Event button from the top left. In the pop-up menu, the corresponding display (single display) or display group (multi display) is selected. Once the desired Layout or Campaign is selected with the start and end times, click Save.
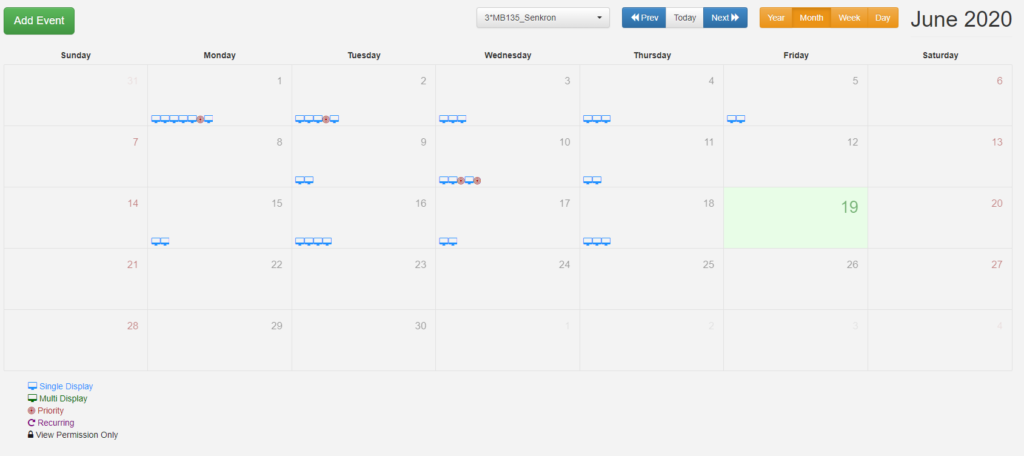
Figure-38: Scheduling an Event
3. In the selected date ranges, the Event will appear with mini logos on the relevant days in the calendar in which the event is planned. The screens with the set event; will start playing the Layouts considering the start and end times.


