This document explains the steps in the client setup of Digiguest. This document has two section;
Telnet Enabling and Connecting: This part explains how to enable telnet connection. This section also includes telnet connection.
Room Registration: This section explains how to register rooms.
Telnet Enabling and Connecting
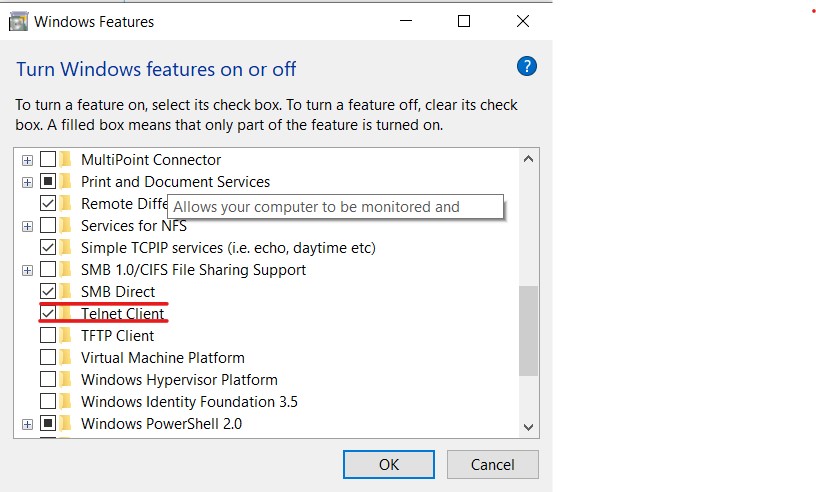
If all processes on the server-side are completed, you can now use the product on the VS client. First of all you need to activate the telnet feature to set starturl. In Figure 3, you can see from where the Telnet feature will be activated on Windows Features.
Figure-1: Activating Telnet Feature
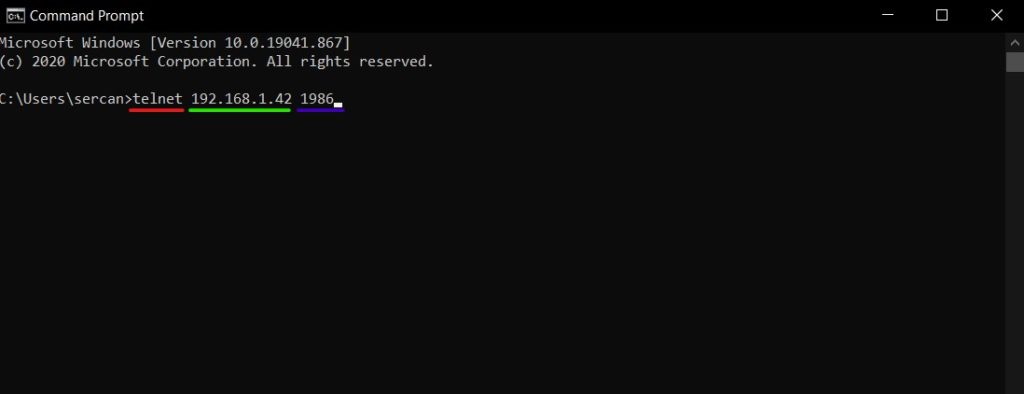
After activating the telnet feature, the connection with the IP address information of the VS client can be established as shown in Figure-2.
Figure-2: Telnet Connection over 1986 Port
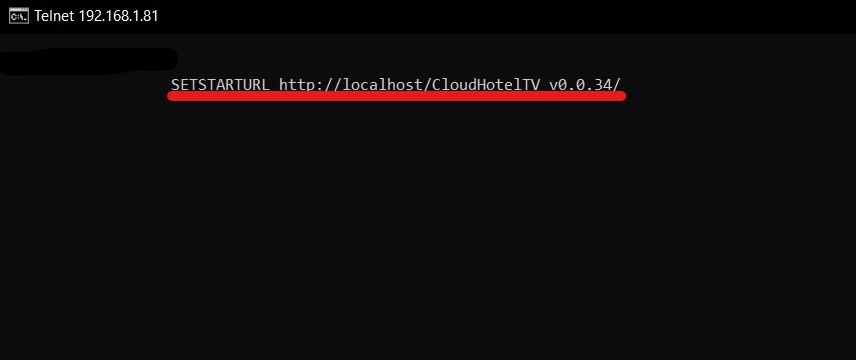
After establishing a connection with the server / pc and VS client on the same network, you can send the SETSTARTURL command as shown in Figure 3.
Figure-3: Sending SETSTARTURL Command
We will be able to see the Digiguest IP application we set up with this command in our VS client. But finally, in order to see the UI, we need to register a room. We need to take look at the Digiguest IP admin panel to create and register a room.
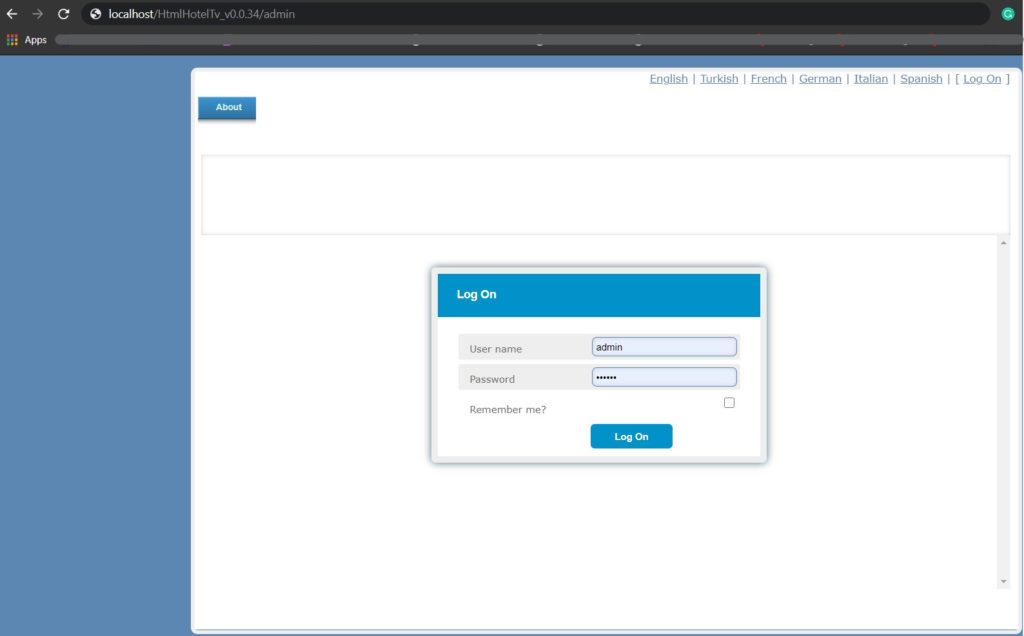
Note: In order to go to the Digiguest IP admin panel, /admin must be added to the end of the application link as shown in Figure 4. And, default username is “admin” and default password is “vestek“.
Room Registration
This section explains how to login admin panel of Digiguest and adding rooms. This section also explains how to register rooms.
Figure-4: Admin Panel of Digiguest
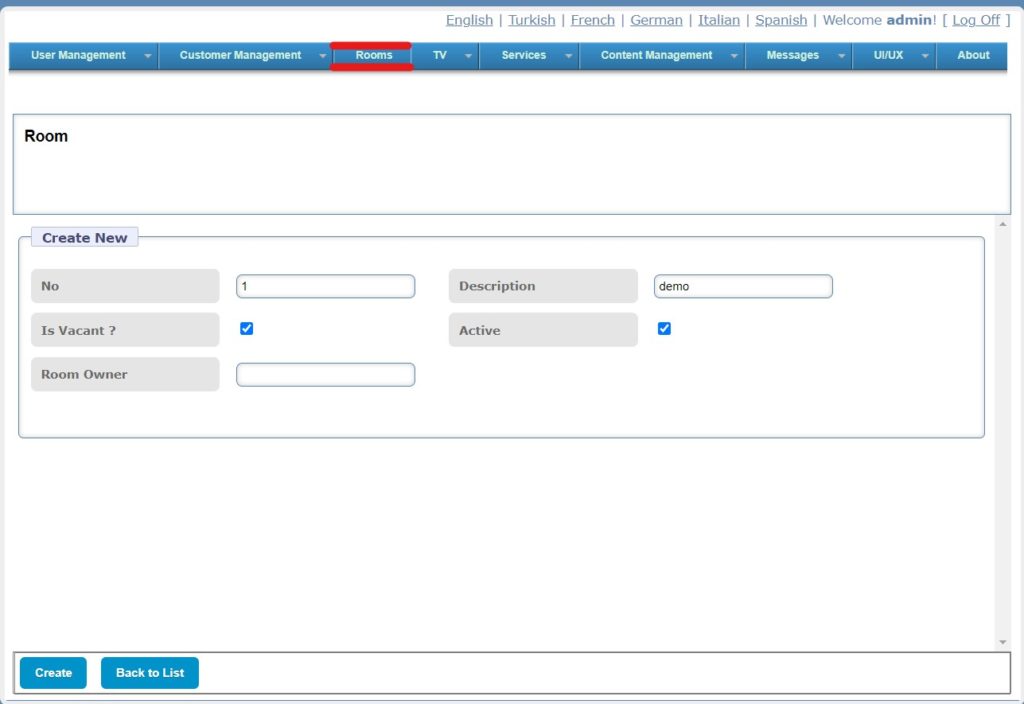
After logging into the system, you can create a new room under the Rooms tab as shown in Figure 5.
Figure 5: Room Registration
You can now register the room you created on the VS client. If you are using a remote with a Numpad, you can enter ‘1 7 5 9‘ respectively and enter the room number. If you have a Non-Numpad control, you can register a room with the help of the virtual keyboard.
You can perform any operation just like room registration, Channel List Operation, and TV Operation, Customer Management, and Services through the admin panel. Please check the category below to see all the operations on the admin panel in more detail.


